How the hell did my macarons not bake well in SG. It can't happen that all those macarons baking in London were just lucky times where I whisked my egg whites to the right stiffness and I fold my macaronage to the right consistency. TT Don't tell me it is LUCK! NOOOOOOO!!!! sob sob.. I feel so ashamed since I have yet to baked the perfect macaron in Singapore. :(
Making macarons are like a nightmare to me here in Singapore. It was so much easier in school just because we have professional chefs watching our every move like an eagle eyeing its prey. In class you can always hear us calling out to chef: 'Chef~~ is this all right? Do I need to whisk it more? How does this consistency look? All right? CHEF~~~' hahaha that is what the classroom sounds like all the time with us girls calling out to chef in our sweetest voice 'Chef~~~' lol..miss those days.
Back to baking macarons in Singapore. I blame it on the weather, I blame it on the ingredients and finally I blame it on myself. Obviously the first 2 reasons are just excuses else shops selling macarons in Singapore will lose their business.
There are 2 methods of making macarons (as far as I know). Method 1 being the combination of dry ingredients to the stiff meringue. Method 2 being the Pierre Herme method of using Italian meringue. Many preferred method 2 as it is more stable, however, it is more tedious as you have to boil sugar to certain temperature before adding it to slightly whisked egg white and continue whisking till stiff. Of course I would prefer method 1 since it is much simpler and the fact that I do not have a Kitchen Aid makes it harder to make italian meringue.
Even though I have not mastered the Art of Macarons Making, I believe that it boils down to perfecting the skills and techniques which is the ability to gauge the 'PEAKNESS' OF THE MERINGUE as well as the CONSISTENCY OF THE MACARONAGE. I had been experimenting, watching and taking notes on those 2 important points and this is by far the best that I had made.

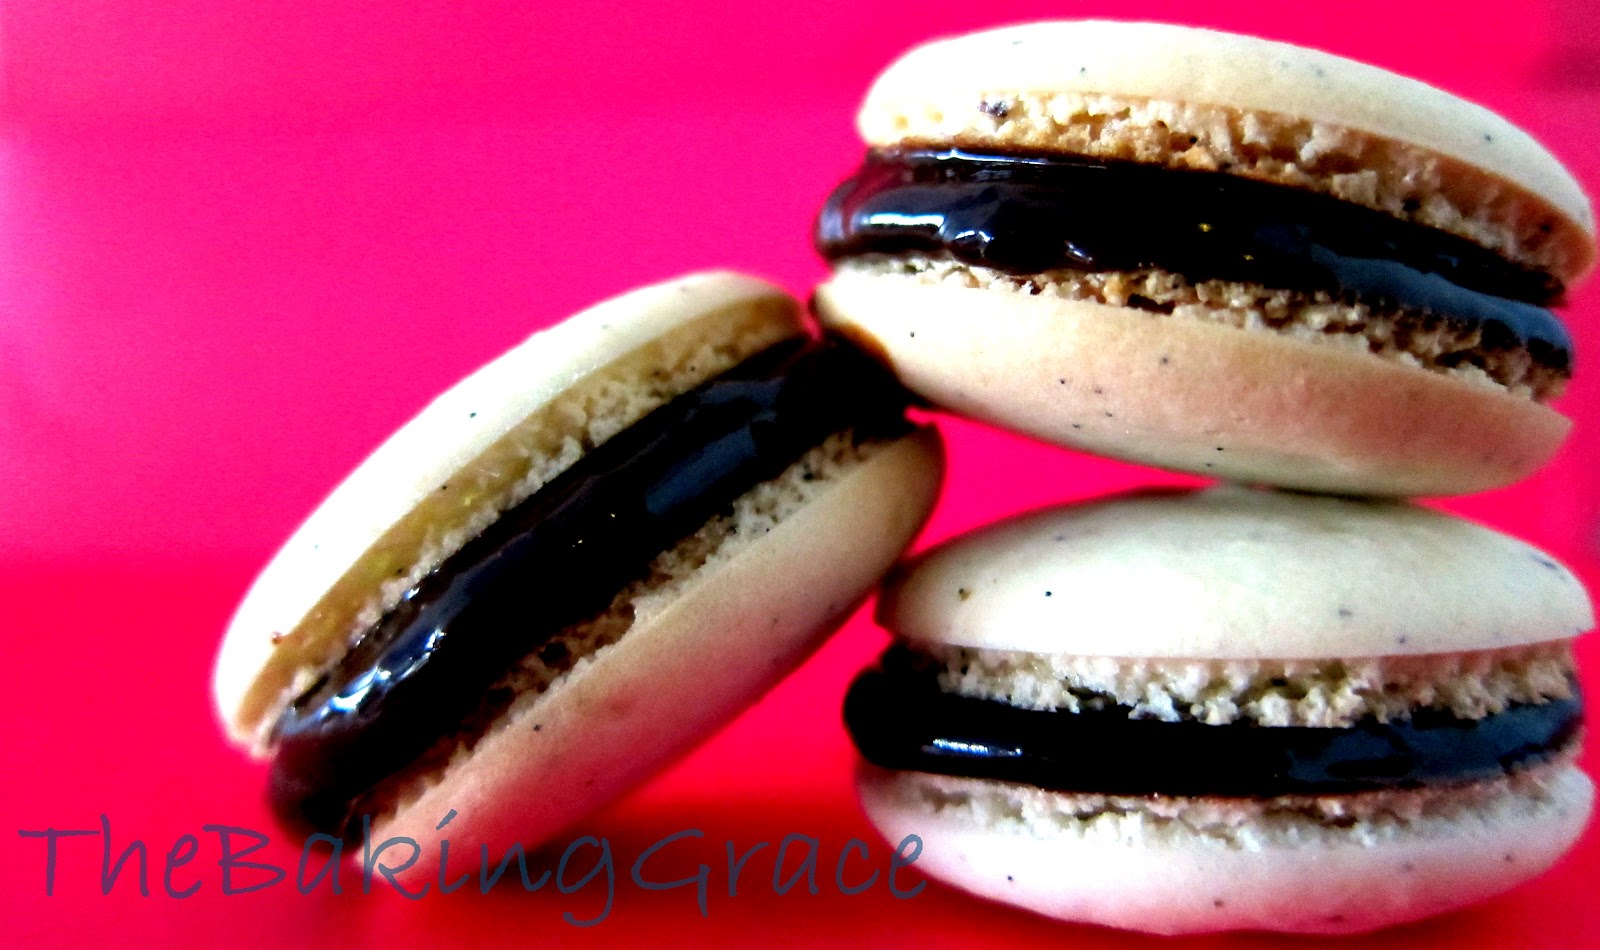
Yes I know it is still a long way to perfection. At least, they tasted all right ( I wouldn't say it is good. Comparing mine to Canele's, let alone Pierre Herme's macaron, OH please. Throw these away.), no cracked shells and there are feets. Though, I could have baked them longer I believe.
As much as I hate to say, I am still on the 'staring anxiously at the oven of macarons, praying for feets and non-crack shells' mode which obviously I would wished to overcome. I want to bake perfect macarons, batch after batch. Hence, knowing where went wrong is exactly important as the 2 important points. So I did research and read up a bit here and there. Guess what I found. Someone named Stella Parks, blogger of BraveTart, who is
Disclaimer: I wouldn't be 100% sure that your batch of macaron will turn out good even following the post religiously. As I had said and Stella had mentioned in her post, it still boils down to the 2 important points that I had stated in order to make the perfect looking macarons. Also, she had stated that macaron mishaps happens from time to time. At least you will know where you went wrong after reading her posts :)
Good luck with your war while I shall battle mine :)
xx,
TBG
p.s. If resources allows me (time, camera and my Goldfish memory), I will snap pictures of the step by step baking process and share it with you in my future post. :D
Updates (27 July 2012)
I had tried out Stella's Recipe and it worked just fine, except the following variations which I did just to experiment a little.
Remembering clearly and reading many macaron posts, my French Chef told us that the shells have to crust before putting into the oven. Even Peirre Herme did that! But Stella said that there is no such need. ZOMG isn't that amazing?!!! Of course I believed her. She had baked so many macarons that I doubt she can even count how many she had baked to date. However, I was a little doubtful of my skills and didnt want to throw my entire macaron batch into the bin. So I played it save by experimenting a little here and there.
Experiment 1
- piped macaron shells onto parchment paper
- baked directly in the oven without waiting for them to crust
- baked without oven fan.
Result - No feet. It is like baked meringue. Slightly cracked. Peels off from parchment.
Experiment 2
- piped macaron shells onto parchment paper
- baked after a layer of thin film forms
- baked without oven fan.Result - No feet. It is like baked meringue again. No cracks. Peels off from parchment.
Experiment 3
- piped macaron shells on Silpat
- baked only after macaron shell forms a layer of thicker crust
- baked with oven fan.
Result - Uneven feet (I blame this on my oven). No cracks. Peels off from Silpat.
Conclusion
- There is no difference in using Parchment paper or Silpat except that you will have to adjust the baking time since Parchment paper is thinner than Silpat.
- It would be good if Stella post step by step photos of the macaronage making process. (Just so we can gauge the stiffness of the meringue and the consistency of the macaronage)
Conclusion (that needs to be verify)
- it could be the crusting of pre-bake macaron shells resulted in the feets appearing.
- it could also be the usage of oven fan that resulted in the appearance of the feets.
Hence, I need to experiment another time with the effect of pre-bake crusting and usage of oven fan.
p.s. To play it safe, I think crusting must be done and before that, you need release air bubbles of the piped macaron shells to prevent cracked shells.
These are the macarons that I had made from Stella's recipe. It worked! :) btw, it is Earl Grey Milk Chocolate.